Go Back   Frag Outpost Forums - Coral Propagation and Reef Aquarium Forums > FragOutpost Forums > DIY

Reply
 
Thread Tools Search this Thread Display Modes
Old 05-22-2007, 11:41 PM   #1
icereefer
Member
 
Join Date: May 2007
Posts: 20
icereefer is on a distinguished road
Default ok my stand for my 75

Well here I go again, starting another project.
I'm pretty much a DIY hobbyist, I get more out of building something for my tank then going out and buy it plus this way I can build it to my needs and I have the pride of saying I did it myself.
Well to start out I needed to build my stand in a fashion so my sump will fit in my stand, my sump is only a 1/4" smaller then my tank in length, so any stand I would have wanted to buy would not work anyway.
Well here is a shot I took of the material I'll be needing minus the doors.

I cheated this time I bought my doors instead of building them, but at $20 a piece I couldn't of built them for that price.

this is the hindges and handles I picked out.

first off I built the top for my stand and as you can see I plained the jointing edges of any high spots, so top would be perfectly level.
icereefer is offline   Reply With Quote
Old 05-22-2007, 11:43 PM   #2
icereefer
Member
 
Join Date: May 2007
Posts: 20
icereefer is on a distinguished road
Default

then I primered it because the top will be black to match the tank. once I'm finished I will be adding a designed trim edge to the tops.

Ok next I needed to make my legs, So I set up a jig so all my leg piece would be the same height.

Next I needed to screw them together, I used 3" deck screws and this loctite super weld glue.

and this is a shot of the legs done.

hoefully today I will have time to finish the frame for my stand.
icereefer is offline   Reply With Quote
Old 05-22-2007, 11:44 PM   #3
icereefer
Member
 
Join Date: May 2007
Posts: 20
icereefer is on a distinguished road
Default

Well the next step was getting the frame done, I made the top out of 2x6, the legs 2x4, and the rest of the frame 2x3, I 45 degreed all my frame pieces so every thing would keep square.
And to help keep it square I glued and clamped all my joints before that got screwed together.

after I got all my frame pieces in I had to add 2x2 fillers so I had something to fasten my panel too.

and here's a shot with my fillers in for my panel and doors.
icereefer is offline   Reply With Quote
Old 05-22-2007, 11:45 PM   #4
icereefer
Member
 
Join Date: May 2007
Posts: 20
icereefer is on a distinguished road
Default

Once I had that done I needed to cut my floor in for my sump, here's a traced shot and one that I cut, using my saber saw.


and this is a shot of sump platform.

and after that it was time to put the top onnext I can put on the paneling
stain it and add the doors.
icereefer is offline   Reply With Quote
Old 05-22-2007, 11:46 PM   #5
icereefer
Member
 
Join Date: May 2007
Posts: 20
icereefer is on a distinguished road
Default

Well I got off work a little early because it was kind of hard to get around today because of are so called blizzard....LOL.
Well first I got my panel on my stand frame.

then Next I routered out for my doors.

Once I got that done it was time to router out my bottom of my cabnets trim piece I like if I can to cut my own trim it says me a little money, plus if you have the router bits why Buy your trim.

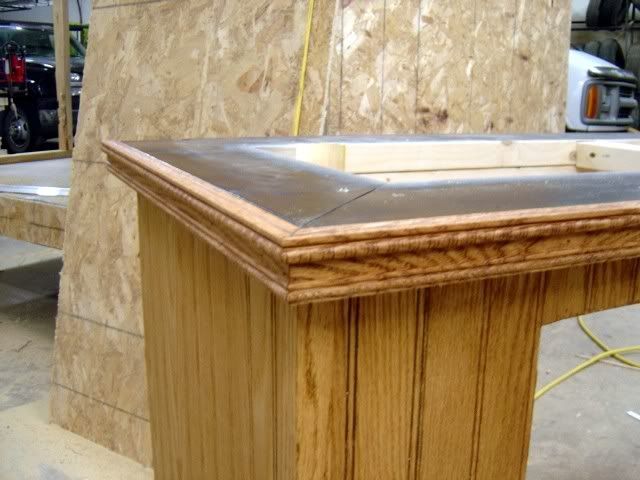
but some times if you want designer trim you just have to buy that, this is the trim I desided on for my top trim.

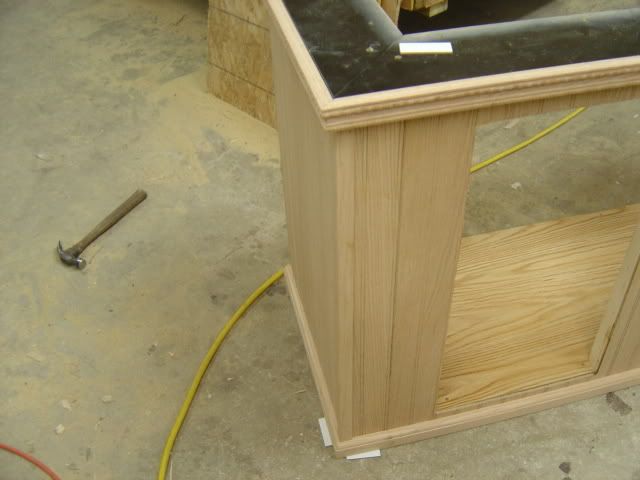
Well I got all my trim on tonite, Heres a corner shot of my stand with the trim done.
icereefer is offline   Reply With Quote
Old 05-22-2007, 11:47 PM   #6
icereefer
Member
 
Join Date: May 2007
Posts: 20
icereefer is on a distinguished road
Default

Well I got all my trim on tonite, Heres a corner shot of my stand with the trim done.

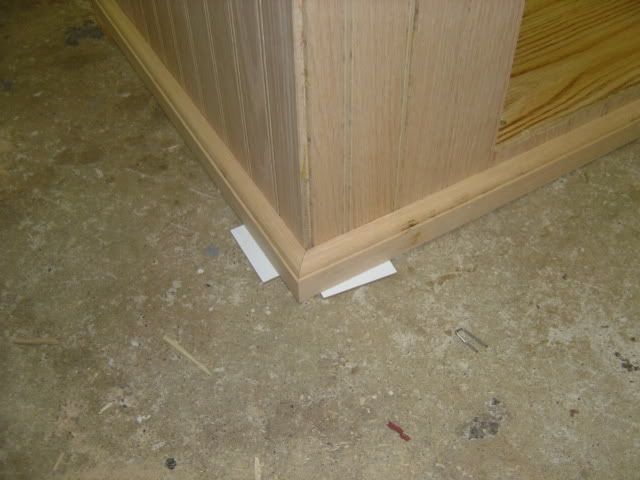
and for those wondering what those little white strips are in the corners, I used a 1/8" hard board as spacers between the floor and the bottom of my trim, because the room I'm putting this in has carpet and I wanted some space between the bottom and the trim so the carpet wouldn't over time roll my trim out of square.
here's a closer shot of it.
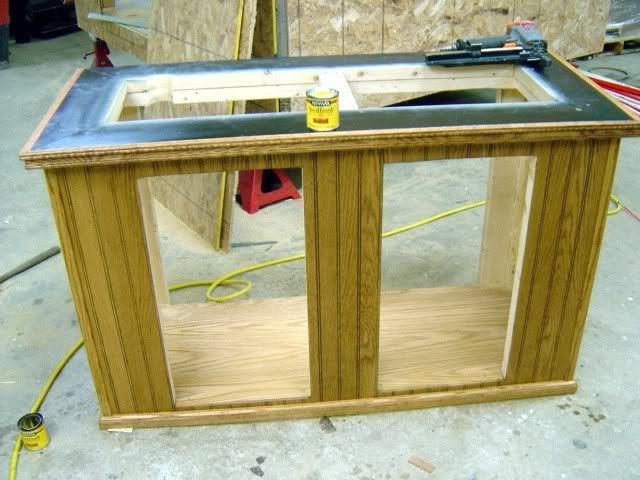
Well it's time to stain my stand, I went with a "Golden oak" stain made by Minwax, to those that haven't stained before, when applying your stain make sure you apply it with a good even coat, so your stain will penatrate into your wood grain, the longer you leave your stain on the darker your wood will look. if I want to go a little lighter in color I'll stain heavy on the side I'm staining once I'm done with that side I'll wipe it off before I do another side.
if I want the true color of the stain I will stain the whole project I'm working on then when I'm done I'll start rubbing my stain off on the side I stained first.
heres a few pictures of my finished stained stand.
icereefer is offline   Reply With Quote
Old 05-22-2007, 11:54 PM   #7
icereefer
Member
 
Join Date: May 2007
Posts: 20
icereefer is on a distinguished road
Default

Well I finally Got it done, this first photo is of the hardware I put on my doors I went with the little seahorse handles, I've used these before and like them.
first off when you screw your hinges on if you have brass screws with your hindges make sure you pre drill your hold brass is really soft and they easily will strip the heads off.

and this picture is with my sump in place.

and finally heres a pic of my 75 gal ready to go finally.
icereefer is offline   Reply With Quote
Old 05-24-2007, 07:04 AM   #8
FragOutpost
Administrator
 
FragOutpost's Avatar
 
Join Date: Oct 2004
Location: FL
Posts: 1,333
FragOutpost is on a distinguished road
Thumbs up

Thanks for sharing your diy stand project. Looks like you have quite the shop there. Did you route the holes for the doors freehand or did you use a jig? Looks like a quality job!
__________________
www.FragOutpost.com


FragOutpost is offline   Reply With Quote
Old 05-24-2007, 08:43 AM   #9
icereefer
Member
 
Join Date: May 2007
Posts: 20
icereefer is on a distinguished road
Default

Quote:
Originally Posted by FragOutpost
Thanks for sharing your diy stand project. Looks like you have quite the shop there. Did you route the holes for the doors freehand or did you use a jig? Looks like a quality job!
Freehand!
icereefer is offline   Reply With Quote
Reply


Currently Active Users Viewing This Thread: 1 (0 members and 1 guests)
 
Thread Tools Search this Thread
Search this Thread:

Advanced Search
Display Modes

Posting Rules
You may not post new threads
You may not post replies
You may not post attachments
You may not edit your posts

vB code is On
Smilies are On
[IMG] code is On
HTML code is Off
Forum Jump


All times are GMT -5. The time now is 06:14 PM.


Powered by vBulletin Version 3.5.4
Copyright ©2000 - 2024, Jelsoft Enterprises Ltd.
Copyright © 2004 - FragOutpost.com - Coral Frag Trading & Coral Propagation Resources